SIZE
Approx size: Height 7.5"
MATERIALS
*Crochet hook size 3mm
*DK weight yarn: Gray (213yds), Black (2yds)
*Felt in small amounts: black, white & red
*Yarn needle
*Sewing needle
*Gray thread
*Fiberfill
*Pinto Beans or any other type of bean
PATTERN NOTES
Gauge isn't all that important, but your hook and yarn choices should result in a fairly tight stitch so that the stuffing won't show through.
Numbers in ( ) at the end of each round or row indicate the total number of stitches for that round or row.
BODY (gray)
Row 1: ch 30, hdc in 2nd ch from hook and hdc in each ch across , ch1, turn (29)
Row 2-31: hdc in each hdc across, ch1, turn (29)
Row 32: front loops only for this row hdc in each hdc across, ch1, turn (29)
Row 33-35: hdc in each hdc across, ch1, turn (29)
Row 36: front loops only for this row hdc in each hdc across, ch1, turn (29)
Row 37-67: hdc in each hdc across, ch1, turn (29)
Row 68: front loops only for this row hdc in each hdc across, ch1, turn (29)
Row 69-71: hdc in each hdc across, ch1, turn (29)
Row 72: Place the two ends together. We’re going to slip stitch the two ends together but on the back piece where going to slip stitch into the front loops only. Slit stitch all the way across.
F/O, secure and weave in ends.
 |
Image 1: Closing the two ends of the body together.
|
SIDES for the body to close it (gray) make 2
Row 1: ch 6, hdc in 2nd ch from hook and hdc in each ch across , ch1, turn (5)
Row 2-31: hdc in each hdc across, ch1, turn (5)
F/O, secure and weave in ends.
 |
Image 2: You want to sew the sides to the body with matching thread or use the whip stitch. (I use matching thread).
|
HAND/ARM (gray) make 2
Rnd 1: 6 sc in Magic Ring (6)
Rnd 2: 2sc in each sc around (12)
Rnd 3: sc in next sc, 2sc in next sc around (18)
Rnd 4: sc in next 2sc, 2sc in next sc around (24)
Rnd 5-11: sc in each sc across (24)
Rnd 12: sc in next 2sc, dec over next 2sc around (18)
Rnd 13: sc in next sc, dec over next 2sc around (12)
Rnd 14: dec over next 2sc around (6)
At this point you will want to stuff the hand moderately firm.
Rnd 15-20: sc in each sc across (6)
F/O, secure and weave in ends. No need to close the opening.
FEET (gray) make 2
[Dec3 instructions: Instead of making a normal dec stitch, this is a decrease over 3 sc. In front loops only: insert yarn thru front loop of first sc, y/o pull through, insert through FL of second sc y/o pull through, insert through FL of third sc y/o pull thru, y/o pull through all loops on hook.]
Rnd 1: 4sc in magic ring. join with sl st to first sc do not turn, continue as if for a ball (4)
Rnd 2: ch 1, 3sc in same stitch as join, and in each sc around, join with sl st to first sc of round (12)
Rnd 3: ch 1, sc in same stitch as join, *3sc next sc, sc in next 2sc* repeat from * to * around to last corner, end with 3sc in corner sc and sc in last sc, Join with sl st to first sc of round. (21)
Rnd 4: ch 1, sc same st as join, sc in next sc, *3sc next sc, sc in next 4sc* repeat from * to * around to last corner, end with 3sc in corner sc and sc in each of last 2sc, Join with sl st to first sc of round. (28)
Rnd 5: ch 1, sc same st as join. sc in next 2 sc. *3sc next sc, sc in next 6sc* repeat from * to * to last corner, end with 3sc in corner sc and sc in each of last 3 sc, Join with sl st to first sc of round (36)
Rnd 6: ch 1, sc same st as join, sc in next 3sc, *3sc next sc, sc in next 8sc* repeat from * to * to last corner, end with 3sc in corner sc and sc in each of last 4 sc. Join with sl st to first sc of round (44)
Rnd 7: ch 1, sc in same stitch as join, sc in each sc around, sl st to the first sc of round(44)
Rnd 8: ch 1, sc in same stitch as join, sc in next 6sc, dec over next 2sc 5times, sc in next 5sc, dec over next 2sc, sc in next 5sc, dec over next 2sc 5times, sc in next 5sc, sl st to the first sc of round. (33)
Rnd 9: ch 1, sc in same stitch as join, sc in each sc around, sl st to the first sc of round(33)
Rnd 10: ch 1, sc in same stitch as join, sc in next 4sc, dec over the next 3sc, dec over next 2sc, dec over next 3sc, sc in next 3, dec over next 2sc, sc in next 3sc, dec over the next 3sc, dec over next 2sc, dec over next 3sc, sc in next 4, sl st to the first sc of round (23)
Rnd 11-12: ch 1, sc in same stitch as join, sc in each sc around, sl st to the first sc of round(33)
F/O, secure and weave in ends. No need to close the opening. Fill completely with just beans.
ASSEMBLY:
I highly recommend pinning all the pieces together before sewing anything to make sure you have all the pieces done right and that you get them in the positions you like best before sewing. It seems like alot of extra work, but this will save you ALOT of hassle.
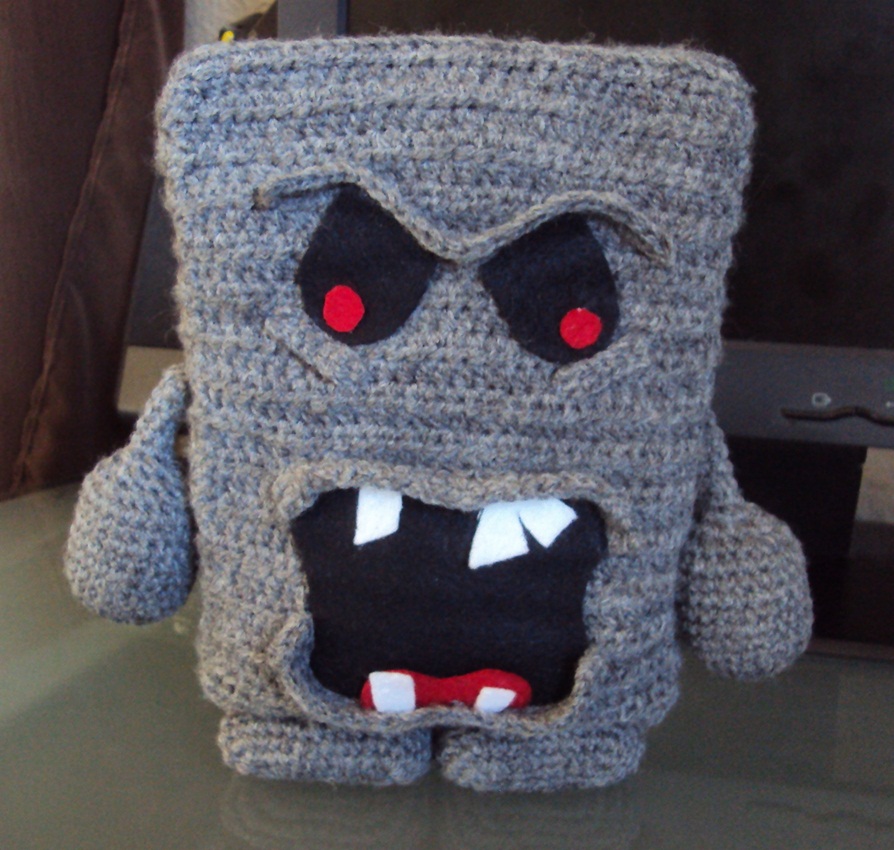
See picture for placement for arm/hand and feet. Eyes, mouth, tongue, teeth are constructed from felt. Sew them in place or glue them.


With black yarn, chain stitch stripes on Whomp’s back. You can either make it look like mine or you can change it up a little. Then you want place the band aids (constructed from yellow felt) in a X shape. You can either sew them or glue them in place.


Hope you enjoy your new plushie. ☺
- Janet Carrillo
Wonderful pattern. I'm so pleased with the outcome! Thanks so much for providing it.
ReplyDeleteMy son is so excited to see these characters of Whomp, Wiggler and Blooper. Thank you so much for sharing the pattern.
ReplyDelete