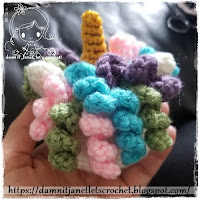
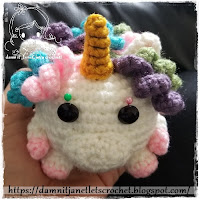
For those who love cute things, this Yeti is the perfect size to hold on your palm or attach to your bag as a keychain and be your traveling companion. You can also make a small blanket and attach him to make a lovey for your little one.
SIZE/MEASUREMENTS
approx. 3"height x 3"length
MATERIALS
*Crochet hook size: 3.5mm (E)
*Worsted Weight Yarn: White (45yds) & Turqua (6yds)
*Stitch Markers to mark your rounds
*Felt: Turquoise & Black
*Fiberfill
*Tapestry Needle
*Matching Thread
*Hot Glue
PATTERN NOTES - must-read...
Numbers in ( ) at the end of each round/row indicate the total number of stitches.
Always use stitch markers to mark your rounds.
There's no need to sl st and/or ch when going to the next round unless stated to do so.
Always do the 1st stitch where you slip stitch from the previous round.
The chain, in the beginning, does NOT count as one stitch unless stated otherwise.
You slip stitch on the first sc, not on top of the chain 1.


HEAD/BODY with white
Rnd 1: 6sc in magic ring (6)
Rnd 2: 2sc in each st around (12)
Rnd 3: sc in next st, 2sc in next st around (18)
Rnd 4: sc in next 2 sts, 2sc in next st around (24)
Rnd 5: sc in next 3 sts, 2sc in next st around (30)
Rnd 6: sc in next 4 sts, 2sc in next st around (36)
Rnd 7: sc in next 11 sts, 2sc in next st around (39)
Rnd 8-15: sc in each st around (39)
Rnd 16: sc in next 11 sts, sc2tog around (36)
Rnd 17: sc in next 4 sts, sc2tog around (30)
Rnd 18: sc in next 3 sts, sc2tog around (24)
Start stuffing the head/body moderately firm.
Rnd 19: sc in next 2 sts, sc2tog around (18)
Rnd 20: sc in next st, sc2tog around (12)
Rnd 21: sc2tog around (6)
F/O and leave a tail for closing. Add any bits of stuffing need it to finish shaping the head/body. Weave in the tail through the final round and draw up tight to close. Secure and weave in the ends.
FEET starting with turqua; make 2
Rnd 1: 5sc in magic ring (5)
Rnd 2: *sc in next st, 2sc in next st* repeat from * to * 1 more time, sc in last st, in last st change to white (7)
Rnd 3: working in back loops for this round only sc in each st around (7)
Rnd 4: sc in each st around (7)
F/O, secure and weave in the ends.
ARMS starting with turqua; make 2
Rnd 1: 5sc in magic ring (5)
Rnd 2: sc in each st around, in last st change to white (5)
Rnd 3: working in back loops for this rnd only sc each st around (5)
Rnd 4: sc in each st around (5)
Rnd 5: sc2tog, sc in next 3 sts (4)
F/O, secure and weave in the ends.
HORNS with turqua; make 2
Rnd 1: 4sc in magic ring (4)
Rnd 2: sc in each st around (4)
Rnd 3: 2sc in next st, sc in next 3 sts, sl st into 1st st (5)
F/O, secure and weave in the ends.
ASSEMBLE
I recommend pinning the pieces in place before sewing them to make sure you have them in the position you like best before sewing. (Most people like to use the yarn at the end of the finished pieces to sew them in place, but I personally like to use matching thread).
TIP...For anything that I’m going to be using felt, I like to first sketch it out on a white paper and make a stencil of what I need. Then cut it out. Then tape the stencil to the felt and cut it out.
FEET...if you have not already stuff them lightly. Place them between round 17 and 19; approx 1.25" apart.

 ARMS...no need to stuff them. Align them to the feet and place them on round 12 and 13.

 HORNS...there's no need to stuff them. Place them in round 6 and 7.

 FACE...using a turquoise felt make a rounded rectangle; approx 1.25"height x 2.25"length. Don't glue it just yet to the body.
EYES...using black felt make 2 small circles and place them in the position you like best.
EYEBROWS...using black embroidery floss or thread, embroider slanted lines above the eyes.
MOUTH...using black embroidery floss or thread, embroider the mouth. Make it however you like, the possibilities are endless.


 CHEEKS...you can use pink felt and make tiny circles or you can use makeup blush and apply some on each side of the eyes using a q-tip.
 FACE...glue it onto the body between round 7 and 13.
 HAIR on top of his HEAD...first find the center of the head. With white yarn, you'll want to cut 4" strands; approx. 8 strands. We'll be placing the strands evenly between round 2 through 6. Fold a strand in half and pass it through and pull through a loop, pull tight. Repeat with the remaining strands. Now that we have added all the strands of hair to the head, using a comb or wire brush and start combing every strand of hair. This would make it look like fur. Trim to the desired length. Finally, style it to your liking.


 MUSTACHE...add 4 strands below the face to give him a little mustache. Repeat the same process as above.


SIZE/MEASUREMENTS
approx. 3"height x 3"length
MATERIALS
*Crochet hook size: 3.5mm (E)
*Worsted Weight Yarn: White (45yds) & Turqua (6yds)
*Stitch Markers to mark your rounds
*Felt: Turquoise & Black
*Fiberfill
*Tapestry Needle
*Matching Thread
*Hot Glue
PATTERN NOTES - must-read...
Numbers in ( ) at the end of each round/row indicate the total number of stitches.
Always use stitch markers to mark your rounds.
There's no need to sl st and/or ch when going to the next round unless stated to do so.
Always do the 1st stitch where you slip stitch from the previous round.
The chain, in the beginning, does NOT count as one stitch unless stated otherwise.
You slip stitch on the first sc, not on top of the chain 1.
HEAD/BODY with white
Rnd 1: 6sc in magic ring (6)
Rnd 2: 2sc in each st around (12)
Rnd 3: sc in next st, 2sc in next st around (18)
Rnd 4: sc in next 2 sts, 2sc in next st around (24)
Rnd 5: sc in next 3 sts, 2sc in next st around (30)
Rnd 6: sc in next 4 sts, 2sc in next st around (36)
Rnd 7: sc in next 11 sts, 2sc in next st around (39)
Rnd 8-15: sc in each st around (39)
Rnd 16: sc in next 11 sts, sc2tog around (36)
Rnd 17: sc in next 4 sts, sc2tog around (30)
Rnd 18: sc in next 3 sts, sc2tog around (24)
Start stuffing the head/body moderately firm.
Rnd 19: sc in next 2 sts, sc2tog around (18)
Rnd 20: sc in next st, sc2tog around (12)
Rnd 21: sc2tog around (6)
F/O and leave a tail for closing. Add any bits of stuffing need it to finish shaping the head/body. Weave in the tail through the final round and draw up tight to close. Secure and weave in the ends.
FEET starting with turqua; make 2
Rnd 1: 5sc in magic ring (5)
Rnd 2: *sc in next st, 2sc in next st* repeat from * to * 1 more time, sc in last st, in last st change to white (7)
Rnd 3: working in back loops for this round only sc in each st around (7)
Rnd 4: sc in each st around (7)
F/O, secure and weave in the ends.
ARMS starting with turqua; make 2
Rnd 1: 5sc in magic ring (5)
Rnd 2: sc in each st around, in last st change to white (5)
Rnd 3: working in back loops for this rnd only sc each st around (5)
Rnd 4: sc in each st around (5)
Rnd 5: sc2tog, sc in next 3 sts (4)
F/O, secure and weave in the ends.
HORNS with turqua; make 2
Rnd 1: 4sc in magic ring (4)
Rnd 2: sc in each st around (4)
Rnd 3: 2sc in next st, sc in next 3 sts, sl st into 1st st (5)
F/O, secure and weave in the ends.
ASSEMBLE
I recommend pinning the pieces in place before sewing them to make sure you have them in the position you like best before sewing. (Most people like to use the yarn at the end of the finished pieces to sew them in place, but I personally like to use matching thread).
TIP...For anything that I’m going to be using felt, I like to first sketch it out on a white paper and make a stencil of what I need. Then cut it out. Then tape the stencil to the felt and cut it out.
FEET...if you have not already stuff them lightly. Place them between round 17 and 19; approx 1.25" apart.
EYES...using black felt make 2 small circles and place them in the position you like best.
EYEBROWS...using black embroidery floss or thread, embroider slanted lines above the eyes.
MOUTH...using black embroidery floss or thread, embroider the mouth. Make it however you like, the possibilities are endless.
GLOSSARY:
f/o: finish off || rnd: round || sc: single crochet || sc2tog: single crochet 2 stitches together
sl st: slip stitch || st/s: stitch/es
Don't forget to like this blog's Facebook fan page.
Or to follow our Instagram page. :)
Have a nice crochet time!
- Janet
- Janet
This pattern is an original pattern by Janet Carrillo "damn it Janet, let's crochet!" (December 2021). Please do not claim this pattern as your own. If you wish to share this pattern, you may link to this pattern but please do not reprint/repost it on your site. You may print and keep a copy for your own personal use. Please do not resell or distribute it.