Showing posts with label disney. Show all posts

February 4, 2020

Round Plush Baymax

By Janet Carrillo "damn it Janet, let's crochet!"
      For those who love cute things, Baymax is the perfect size to hold on your palm or attach to your bag as a keychain and be your traveling companion. You can also make a small blanket and attach him to make a lovey for your little one.

SIZE/MEASUREMENTS
approx. 2.5"height x 3.25"length

MATERIALS
*Crochet hook size: 3.5mm (E)
*Worsted Weight Yarn: White (36yds)
*Stitch Markers to mark your rounds
*Fiberfill
*Felt: Gray & Black
*Tapestry Needle
*Matching Thread
*Hot Glue

PATTERN NOTES - must-read...
 Numbers in ( ) at the end of each round/row indicate the total number of stitches.
 Always use stitch markers to mark your rounds.
 There's no need to sl st and/or ch when going to the next round unless stated to do so.
 Always do the 1st stitch where you slip stitch from the previous round.
 The chain, in the beginning, does NOT count as one stitch unless stated otherwise.
 You slip stitch on the first sc, not on top of the chain 1.

HEAD/BODY with white
  Rnd 1: 6sc in magic ring (6)
  Rnd 2: 2sc in each st around (12)
  Rnd 3: sc in next st, 2sc in next st around (18)
  Rnd 4: sc in next 2 sts, 2sc in next st around (24)
  Rnd 5: sc in next 3 sts, 2sc in next st around (30)
  Rnd 6: sc in next 4 sts, 2sc in next st around (36)
  Rnd 7: sc in next 11 sts, 2sc in next st around (39)
  Rnd 8-13: sc in each st around (39)
  Rnd 14: sc in next 11 sts, sc2tog around (36)
  Rnd 15: sc in next 4 sts, sc2tog around (30)
  Rnd 16: sc in next 3 sts, sc2tog around (24)
Start stuffing the head/body moderately firm.
  Rnd 17: sc in next 2 sts, sc2tog around (18)
  Rnd 18: sc in next st, sc2tog around (12)
  Rnd 19: sc2tog around (6)
F/O and leave a tail for closing. Add any bits of stuffing need it to finish shaping the head/body. Weave in the tail through the final round and draw up tight to close. Secure and weave in the ends.

FEET with white; make 2
  Rnd 1: 5sc in magic ring (5)
  Rnd 2: *sc in next st, 2sc in next st* repeat from * to * 1 more time, sc in last st (7)
  Rnd 3: working in back loops for this round only sc in each st around (7)
  Rnd 4: sc in each st around (7)
F/O, secure and weave in the ends.

ARMS with white; make 2
  Rnd 1: 5sc in magic ring (5)
  Rnd 2-3: sc in each st around (5)
  Rnd 4: sc2tog, sc in next 3 sts (4)
F/O, secure and weave in the ends.


ASSEMBLE
     I recommend pinning the pieces in place before sewing them to make sure you have them in the position you like best before sewing. (Most people like to use the yarn at the end of the finished pieces to sew them in place, but I personally like to use matching thread).
     TIP...For anything that I’m going to be using felt, I like to first sketch it out on a white paper and make a stencil of what I need. Then cut it out. Then tape the stencil to the felt and cut it out.
     FEET...if you haven't already stuff them lightly. Place them between round 14 and 16; approx 1.25" apart.
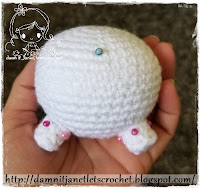
     ARMS...no need to stuff them. Align them to the feet and place them on round 11 and 12.
     SPOTS...using grey felt create the spots like in the picture below.
     EYES...using black felt make 2 small rounded rectangles. Place them in round 8 and 9. With a black embroidery floss or thread, embroider a line across from one eye to the other eye like in the picture below.

GLOSSARY:
ch/s:chain/s || sc: single crochet || st/s: stitch/es
sc2tog: single crochet 2 stitches together || rnd: round || f/o: finish off


Don't forget to like this blog facebook fan page.
Or to follow our Instagram page. :)

Have a nice crochet time!
- Janet

Baymax and Big Hero 6 are copyright by Disney.
This pattern is an original pattern by Janet Carrillo "damn it Janet, let's crochet!" (February 2020). Please do not claim this pattern as your own. If you wish to share this pattern, you may link to this pattern but please do not reprint/repost it on your site. You may print and keep a copy for your own personal use. Please do not resell or distribute it.

January 6, 2020

Round Plush Baby Yoda

By Janet Carrillo "damn it Janet, let's crochet!"
      For those who love cute things, Baby Yoda is the perfect size to hold on your palm or attach to your bag as a keychain and be your traveling companion. You can also make a small blanket and attach him to make a lovey for your little one.

SIZE/MEASUREMENTS
approx. 3.25"height x 7"length

MATERIALS
*Crochet hook size: 3.5mm (E)
*Worsted Weight Yarn: Tea Leaf (50yds), Light Brown (18yds) & Beige (8yds)
*Stitch Markers to mark your rounds
*Fiberfill
*Black Round Domed Buttons or Safety Eyes (10mm)
*Tapestry Needle
*Matching Thread
*Makeup Blush & Q-tip (optional)

PATTERN NOTES - must-read...
 Numbers in ( ) at the end of each round/row indicate the total number of stitches.
 Always use stitch markers to mark your rounds.
 There's no need to sl st and/or ch when going to the next round unless stated to do so.
 Always do the 1st stitch where you slip stitch from the previous round.
 The chain, in the beginning, does NOT count as one stitch unless stated otherwise.
 You slip stitch on the first sc, not on top of the chain 1.

SPECIAL STITCHES
Picot Stitch - ch3, insert hook into the 3rd chain from hook, y/o & draw up the yarn through all the loops.

Note: If you're going to be using safety eyes, place them before closing the body. I'm using round domed buttons.
HEAD/BODY with tea leaf
  Rnd 1: 6sc in magic ring (6)
  Rnd 2: 2sc in each st around (12)
  Rnd 3: sc in next st, 2sc in next st around (18)
  Rnd 4: sc in next 2 sts, 2sc in next st around (24)
  Rnd 5: sc in next 3 sts, 2sc in next st around (30)
  Rnd 6: sc in next 4 sts, 2sc in next st around (36)
  Rnd 7: sc in next 11 sts, 2sc in next st around (39)
  Rnd 8-15: sc in each st around (39)
  Rnd 16: sc in next 11 sts, sc2tog around (36)
  Rnd 17: sc in next 4 sts, sc2tog around (30)
  Rnd 18: sc in next 3 sts, sc2tog around (24)
Start stuffing the head/body moderately firm.
  Rnd 19: sc in next 2 sts, sc2tog around (18)
  Rnd 20: sc in next st, sc2tog around (12)
  Rnd 21: sc2tog around (6)
F/O and leave a tail for closing. Add any bits of stuffing need it to finish shaping the head/body. Weave in the tail through the final round and draw up tight to close. Secure and weave in the ends.

FEET with tea leaf; make 2
  Rnd 1: 5sc in magic ring (5)
  Rnd 2: *sc in next st, 2sc in next st* repeat from * to * 1 more time, sc in last st (7)
  Rnd 3: working in back loops for this round only sc in each st around (7)
  Rnd 4: sc in each st around (7)
F/O, secure and weave in the ends.

ARMS starting with tea leaf; make 2
  Rnd 1: 5sc in magic ring (5)
  Rnd 2: sc in each st around, in last st change to light brown (5)
  Rnd 3: working in front loops for this rnd only *sc in next st, 2sc in next st* repeat from * to * 1 more time, sc in last st (7)
  Rnd 4: *sc2tog* repeat from * to * 2 more times, sc in next st (4)
F/O, secure and weave in the ends.

COAT starting with light brown
  Row 1: ch43, dc in 3rd ch from hook and across, ch2, turn (41)
  Row 2-3: dc in each st across, in last st of rnd 3 change to beige, ch2, turn (41)
  Row 4: working in back loops for this round only 3dc in next st, dc in next 39 sts, 3dc in last st, ch2, sl st in the same st where you did the last 3dc's (45)
F/O, secure and weave in the ends.

EARS with tea leaf; make 2
  Row 1: ch9 (leave a long tail to sew onto the plushie), sc in 2nd ch from hook and across, ch1, turn (8)
  Row 2: sc in each st across, ch1, turn (8)
  Row 3: sc2tog, sc in next 4 sts, sc2tog, ch1, turn (6)
  Row 4: sc in each st across, ch1, turn (6)
  Row 5: sc2tog, sc in next 2 sts, sc2tog, ch1, turn (4)
  Row 6: sc in each st across, ch1, turn (4)
  Row 7: sc2tog, sc2tog, ch1, turn (2)
  Row 8: sc in each st across, ch1, turn (2)
  Row 9: sc2tog, turn (1)
  Row 10: picot st, sl st into next st (1)
F/O, secure and weave the end from the pointy part.
Fold the ears in a wave of 3 folds on the wide part and stitch through all the layers with your needle to make the ear shape.

ACCENTS FOR THE EYES with tea leaf; make 4
  Row 1: ch5
F/O, secure and leave tails at both ends to sew onto the plushie.

WRINKLES or EYEBROWS with tea leaf; make 2
  Row 1: ch6, hdc in 2nd ch from hook and across, ch2, sl st into the last st where you made the 4th hdc
F/O, secure and weave in the ends.

NOSE with tea leaf
  Rnd 1: 4sc in magic ring, sl st into 1st st (4)
F/O, secure and weave in the ends.


ASSEMBLE
     I recommend pinning the pieces in place before sewing them to make sure you have them in the position you like best before sewing. (Most people like to use the yarn at the end of the finished pieces to sew them in place, but I personally like to use matching thread).
     TIP...For anything that I’m going to be using felt, I like to first sketch it out on a white paper and make a stencil of what I need. Then cut it out. Then tape the stencil to the felt and cut it out.
     FEET...if you haven't already stuff them lightly. Place them between round 16 and 18; approx 1.25" apart.
     COAT...fold down the beige part. Place the coat on round 12. Find the center between both feet, this is where the opening of the coat will be. You don't want to completely sew it in place, only sew the back loops that where left unworked to the body.
     ARMS...no need to stuff them. Align them to the feet and place them on row 3 of the coat underneath the beige part.
     EARS...if you haven't already, fold the ears in a wave of 3 folds on the wide part and stitch through all the layers with your needle to make the ear shape. Align them to the arms and place them between round 7 and 9.
     EYES...I'm using the rounded domed buttons since I have no crafts stores around my area that sell safety eyes. I'll be placing them between round 8 and 9; approx. 1" apart. Place the accents above and below the eyes.
     NOSE...place in the center of the eyes between round 10 and 11.
     WRINKLES...place them above the eyes.
     OPTIONAL...if you like you can use some makeup blush and a q-tip to add some color to the ears.

GLOSSARY:
ch/s:chain/s || sc: single crochet || hdc: half double crochet || dc: double crochet || sl st: slip stitch
st/s: stitch/es || sc2tog: single crochet 2 stitches together || rnd: round || f/o: finish off


Don't forget to like this blog facebook fan page.
Or to follow our Instagram page. :)

Have a nice crochet time!
- Janet

Baby Yoda is copyright by Disney.
This pattern is an original pattern by Janet Carrillo "damn it Janet, let's crochet!" (January 2020). Please do not claim this pattern as your own. If you wish to share this pattern, you may link to this pattern but please do not reprint/repost it on your site. You may print and keep a copy for your own personal use. Please do not resell or distribute it.

August 11, 2019

Round Plush Dumbo

By Janet Carrillo "damn it Janet, let's crochet!"
      For those who love cute things, Dumbo is the perfect size to hold on your palm or attach to your bag as a keychain and be your traveling companion. You can also make a small blanket and attach him to make a lovey for your little one.

SIZE/MEASUREMENTS
approx. 3.75"height x 5"length

MATERIALS
*Crochet hook size: 3.5mm (E)
*Worsted Weight Yarn: Turquoise (45yds), Red (10yds) & Yellow (3yds)
*Stitch Markers to mark your rounds
*Felt: Black & Pink
*Embroider Floss: Yellow
*Fiberfill
*Tapestry Needle
*Matching Thread
*Hot Glue

PATTERN NOTES - must read...
 Numbers in ( ) at the end of each round/row indicate the total number of stitches.
 Always use stitch markers to mark your rounds.
 There's no need to sl st and/or ch when going to the next round unless stated to do so.
 Always do the 1st stitch where you slip stitch from the previous round.
 The chain, in the beginning, does NOT count as one stitch unless stated otherwise.
 You slip stitch on the first sc, not on top of the chain 1.

SPECIAL STITCHES
Invisible join - this VIDEO explains how to do this technique.

HEAD/BODY with turquoise
  Rnd 1: 6sc in magic ring (6)
  Rnd 2: 2sc in each st around (12)
  Rnd 3: sc in next st, 2sc in next st around (18)
  Rnd 4: sc in next 2 sts, 2sc in next st around (24)
  Rnd 5: sc in next 3 sts, 2sc in next st around (30)
  Rnd 6: sc in next 4 sts, 2sc in next st around (36)
  Rnd 7: sc in next 11 sts, 2sc in next st around (39)
  Rnd 8-13: sc in each st around (39)
  Rnd 14: sc in next 11 sts, sc2tog around (36)
  Rnd 15: sc in next 4 sts, sc2tog around (30)
  Rnd 16: sc in next 3 sts, sc2tog around (24)
Start stuffing the head/body moderately firm.
  Rnd 17: sc in next 2 sts, sc2tog around (18)
  Rnd 18: sc in next st, sc2tog around (12)
  Rnd 19: sc2tog around (6)
F/O and leave a tail for closing. Add any bits of stuffing need it to finish shaping the head/body. Weave in the tail through the final round and draw up tight to close. Secure and weave in the ends.

FEET with turquoise; make 4
  Rnd 1: 5sc in magic ring (5)
  Rnd 2: *sc in next st, 2sc in next st* repeat from * to * 1 more time, sc in last st (7)
  Rnd 3: working in back loops for this round only sc in each st around (7)
  Rnd 4: sc in each st around (7)
F/O, secure and weave in the ends.

TRUNK with turquoise
  Rnd 1: 4sc in magic ring (4)
  Rnd 2: sc in each st around (4)
  Rnd 3: 2sc in next st, hdc in next 2 sts, 2sc in next st (6)
  Rnd 4: 2sc in next st, hdc in next 4 sts, 2sc in next st (8)
  Rnd 5: 2sc in next st, sc in next 6 sts, 2sc in next st (10)
  Rnd 6: sc in each st around, join to 1st st with the invisible join (10)
F/O, secure and weave in the ends.

Note: when you see a + sign it means all those stitches are supposed to be done in that one particular stitch.
COLLAR with red
ch42, sl st into the 1st st to form a ring (42)
  Rnd 1: ch1, sc in next ch, 2sc in next ch around (63)
  Rnd 2: working in the back loops only *sl st in next 2 sts, sl st+ch1+sl st in next st* repeat from * to * around, join to 1st st with the invisible join (105)
F/O, secure and weave in the ends.

LEFT EAR with turquoise
  Row 1: ch5, sc in 2nd ch from hook, sc in next 3 sts, ch1, turn (4)
  Row 2: 2sc in next st, sc in next 2 sts, 2sc in next st, ch1, turn (6)
  Row 3: sk next st, sc in next 4 sts, 2sc in next st, ch1, turn (6)
  Row 4: sc in each st across, ch1, turn (6)
  Row 5: sc in next 5 sts, 2sc in next st, ch1, turn (7)
  Row 6: sc in each st across, ch1, turn (7)
  Row 7: sl st around the entire ear
F/O, secure and weave in the ends.

RIGHT EAR with turquoise
  Row 1: ch5, sc in 2nd ch from hook, sc in next 3 sts, ch1, turn (4)
  Row 2: 2sc in next st, sc in next 2 sts, 2sc in next st, ch1, turn (6)
  Row 3: 2sc in next st, sc in next 4 sts, leave the last st unworked, ch1, turn (6)
  Row 4: sc in each st across, ch1, turn (6)
  Row 5: 2sc in next st, sc in next 5 sts, ch1, turn (7)
  Row 6: sc in each st across, ch1, turn (7)
  Row 7: sl st around the entire ear
F/O, secure and weave in the ends.

HAT with yellow
  Rnd 1: 4sc in magic ring (4)
  Rnd 2: sc in each st around (4)
  Rnd 3: sc in next st, 2sc in next st around (6)
  Rnd 4: sc in next 2 sts, 2sc in next st around (8)
  Rnd 5: front loops only for this round only sc in next 3 sts, 2sc in next st around, sl st into 1st st (10)
F/O, secure and weave in the ends.

TAIL with turquoise
  Row 1: ch4, sl st in 2nd ch from hook, sl st in next ch, sc in next ch (3)
F/O and leave a tail to sew it to the body.


ASSEMBLE
     I recommend pinning the pieces in place before sewing them to make sure you have them in the position you like best before sewing. (Most people like to use the yarn at the end of the finished pieces to sew them in place, but I personally like to use matching thread).
     TIP...For anything that I’m going to be using felt, I like to first sketch it out on a white paper and make a stencil of what I need. Then cut it out. Then tape the stencil to the felt and cut it out.
     FEET...lightly stuffed them. Try to find the position you like best. I place mine between round 16 and 17; approx. 1" from each other.
     TRUNK...there's no need to stuff it. You'll want the part that we did the increases to be facing up and the hdc's should be in the bottom. Align the trunk to the center of the front feet between round 11 and 12.
     COLLAR...using yellow embroidery floss or thread, slip stitch between the front loops and round 2.
     Place the collar underneath the trunk on round 12 and sew it in place.
     EARS...place the ears between round 8 and 11. Align the ears to the center of the feet like seen in the picture.
     Using pink felt, cut out a similar shape to the ear but slightly smaller. Glue it on top and repeat this for the other ear.
     You will be folding up the top portion a bit and sewing it so it stays in place. This will make it look like the ears are droopy.
     HAT...lightly stuffed it. Place it in the position you like best.
     TAIL...align it to the center of the back feet and place it on round 14.
     EYES...using black felt, make 2 small circles. Place them between round 9 and 10; approx. 1.125" apart.
     CHEEKS...you can use pink felt and make tiny circles or you can use makeup blush and apply some on each side of the eyes.

GLOSSARY:
ch/s:chain/s || sc: single crochet || hdc: half double crochet || sl st: slip stitch || st/s: stitch/es || sk: skip
sc2tog: single crochet 2 stitches together || rnd: round || f/o: finish off


Don't forget to like this blog facebook fan page.
Or to follow our Instagram page. :)

Have a nice crochet time!
- Janet

Dumbo is copyright by Disney.
This pattern is an original pattern by Janet Carrillo "damn it Janet, let's crochet!" (August 2019). Please do not claim this pattern as your own. If you wish to share this pattern, you may link to this pattern but please do not reprint/repost it on your site. You may print and keep a copy for your own personal use. Please do not resell or distribute it.

June 12, 2019

Round Plush Hamm from Toy Story

By Janet Carrillo "damn it Janet, let's crochet!"
      For those who love cute things, Hamm is the perfect size to hold on your palm or attach to your bag as a keychain and be your traveling companion. You can also make a small blanket and attach him to make a lovey for your little one.

SIZE/MEASUREMENTS
approx. 3.25" height x 3"length

MATERIALS
*Crochet hook size: 3.5mm (E)
*Worsted Weight Yarn: Light Pink (40yds)
*Stitch Markers to mark your rounds
*Felt: a darker shade of Pink & Black
*Fiberfill
*Tapestry Needle
*Matching Thread
*Hot Glue

PATTERN NOTES - must read...
 Numbers in ( ) at the end of each round/row indicate the total number of stitches.
 Always use stitch markers to mark your rounds.
 There's no need to sl st and/or ch when going to the next round unless stated to do so.
 Always do the 1st stitch where you slip stitch from the previous round.
 The chain, in the beginning, does NOT count as one stitch unless stated otherwise.
 You slip stitch on the first sc, not on top of the chain 1.

HEAD/BODY with light pink
  Rnd 1: 6sc in magic ring (6)
  Rnd 2: 2sc in each st around (12)
  Rnd 3: sc in next st, 2sc in next st around (18)
  Rnd 4: sc in next 2 sts, 2sc in next st around (24)
  Rnd 5: sc in next 3 sts, 2sc in next st around (30)
  Rnd 6: sc in next 4 sts, 2sc in next st around (36)
  Rnd 7: sc in next 11 sts, 2sc in next st around (39)
  Rnd 8-13: sc in each st around (39)
  Rnd 14: sc in next 11 sts, sc2tog around (36)
  Rnd 15: sc in next 4 sts, sc2tog around (30)
  Rnd 16: sc in next 3 sts, sc2tog around (24)
Start stuffing the head/body moderately firm.
  Rnd 17: sc in next 2 sts, sc2tog around (18)
  Rnd 18: sc in next st, sc2tog around (12)
  Rnd 19: sc2tog around (6)
F/O and leave a tail for closing. Add any bits of stuffing need it to finish shaping the head/body. Weave in the tail through the final round and draw up tight to close. Secure and weave in the ends.

FEET with light pink; make 4
  Rnd 1: 5sc in magic ring (5)
  Rnd 2: *sc in next st, 2sc in next st* repeat from * to 1 more time, sc in last st (7)
  Rnd 3: working in back loops for this round only sc in each st around (7)
  Rnd 4: sc in each st around (7)
F/O, secure and weave in the ends.

EARS with light pink; make 2
  Rnd 1: 5sc in magic ring (5)
  Rnd 2: *sc in next st, 2sc in next st* repeat from * to * 1 more time, sc in last st (7)
  Rnd 3: *sc in next 2 sts, 2sc in next st* repeat from * to * 1 more time, sc in last st, sl st into 1st st (9)
F/O, secure and weave in the ends.

TAIL with light pink
ch6, 2sc in 2nd ch from hook and across (10)
F/O, secure and weave in the ends.


ASSEMBLE
     I recommend pinning the pieces in place before sewing them to make sure you have them in the position you like best before sewing. (Most people like to use the yarn at the end of the finished pieces to sew them in place, but I personally like to use matching thread).
     TIP...For anything that I’m going to be using felt, I like to first sketch it out on a white paper and make a stencil of what I need. Then cut it out. Then tape the stencil to the felt and cut it out.
     FEET...lightly stuffed them. Try to find the position you like best. I place mine between round 15 and 17; approx. 1" from each other.
     EARS...there's no need to stuff them, simply flatten them and place them between round 4 and 7.
     TAIL...place it on round 13 right in the center between the back feet.
     SNOUT...using pink felt, make an oval (1.5" lengthwise). Before placing it in place, create the nostrils with a darker shade of thread than the felt snout. Place it between round 11 and 13.
     EYES...using black felt, make 2 small circles. Place them on round 8; approx. 0.75" apart.
     EYEBROWS...using black thread or embroidery floss, embroider them just right above the eyes on round 6. You can make these however you like, but I simply made a slanted line.

GLOSSARY:
ch/s:chain/s || sc: single crochet || sl st: slip stitch || st/s: stitch/es
 sc2tog: single crochet 2 stitches together || rnd: round || f/o: finish off


Don't forget to like this blog facebook fan page.
Or to follow our Instagram page. :)

Have a nice crochet time!
- Janet

Hamm and Toy Story are copyright by Disney.
This pattern is an original pattern by Janet Carrillo "damn it Janet, let's crochet!" (June 2019). Please do not claim this pattern as your own. If you wish to share this pattern, you may link to this pattern but please do not reprint/repost it on your site. You may print and keep a copy for your own personal use. Please do not resell or distribute it.